How to Add RTSP Cameras to TheRelay
Adding Cameras to TheRelay
Add your RTSP cameras to TheRelay by providing the camera's RTSP stream URL and credentials. The TheRelay Agent will handle the rest, publishing your streams securely to the cloud.
What You Need
- Camera IP address on your LAN
- RTSP stream URL (stream path)
- Camera username and password
- TheRelay Agent already installed
After Adding
- Stream appears in dashboard within seconds
- Cloud endpoints are ready to use
- Access via WebRTC, RTSP, HLS, RTMP, or SRT
- Token-based access control available
Adding a Camera - Step by Step
Step 1: Find Your Camera's RTSP URL
Each camera manufacturer uses different stream paths. Use the examples below to find the correct URL format for your camera.
Step 2: Log Into TheRelay Dashboard
Navigate to the Agents section and select the agent where you want to add the camera.
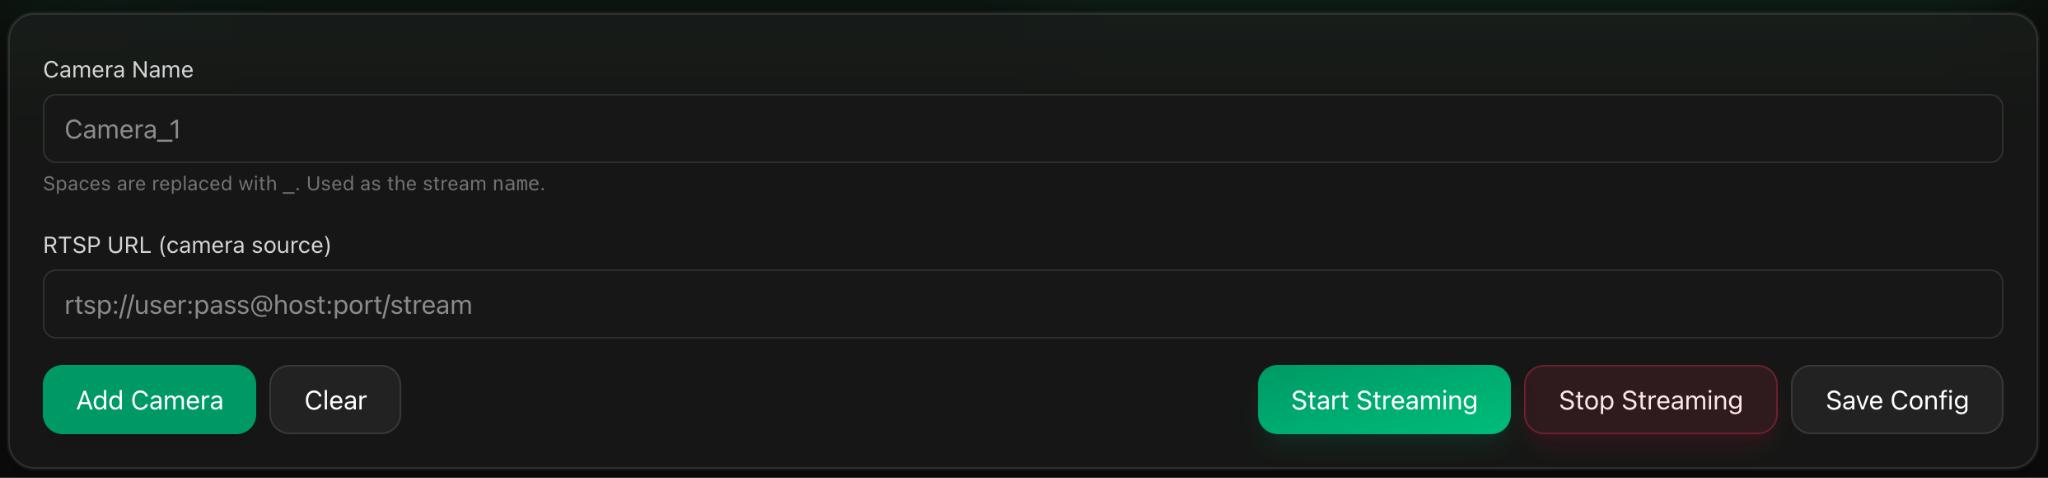
Step 3: Add Camera
Click "+ Add Camera" and fill in the following:
- Camera Name: A friendly name (e.g., "Entrance Camera")
- RTSP URL: The full RTSP stream path from your camera
- Username: Camera login username
- Password: Camera login password
Step 4: Verify Connection
Click "Test Connection" to verify the agent can reach the camera and stream is accessible.
Step 5: Save Camera
Click "Save". The camera will appear in your dashboard within seconds.
RTSP URL Examples by Camera Brand
Use these examples to construct the correct RTSP URL for your camera model. Replace the IP address, username, password, and stream parameters with your actual camera details.
Hikvision Cameras
Main Stream (High Quality):
rtsp://username:password@192.168.1.100:554/Streaming/Channels/101Sub Stream (Low Bandwidth):
rtsp://username:password@192.168.1.100:554/Streaming/Channels/102Dahua Cameras
Main Stream:
rtsp://username:password@192.168.1.100:554/stream/mainSub Stream:
rtsp://username:password@192.168.1.100:554/stream/subAxis Cameras
RTSP Stream:
rtsp://username:password@192.168.1.100:554/axis-media/media.ampGeneric RTSP Cameras
Standard RTSP:
rtsp://username:password@192.168.1.100:554/streamAlternative:
rtsp://username:password@192.168.1.100:554/liveTesting Without TheRelay
To test an RTSP URL before adding it to TheRelay, you can use VLC:
- Open VLC Media Player
- Go to Media > Open Network Stream
- Paste your RTSP URL
- Click Play
- If the stream plays, the URL is correct
Finding Your Camera's IP Address
Network Scan Method
Use network scanning tools to find devices on your network:
- On Windows: Use Advanced IP Scanner or Angry IP Scanner
- On Linux: Use
nmaporarp-scan - Look for devices matching your camera manufacturer
Router Method
Check your router's DHCP client list:
- Log into your router admin interface
- Navigate to DHCP or Connected Devices
- Look for your camera by MAC address or hostname
- Note the assigned IP address
Default Credentials
If you don't know the camera password, check the manufacturer's documentation for default credentials:
- Hikvision: admin / 12345
- Dahua: admin / admin
- Axis: root / (no password)
- Always change default credentials in production
Troubleshooting Camera Connection
Connection Test Failed
- Verify the IP address is correct
- Confirm username and password are correct
- Test RTSP URL in VLC first
- Check firewall between agent and camera
- Ensure RTSP port (usually 554) is not blocked
Camera Offline in Dashboard
- Check if camera is powered on
- Verify network connectivity to camera
- Review agent logs for disconnection reason
- Restart the agent service if needed
Poor Stream Quality
- Use main stream instead of sub-stream for better quality
- Check agent CPU and network bandwidth
- Reduce bitrate settings in camera if available
- Consider using SRT protocol for better reliability